
One of the main reasons I got the SDRPlay RSP was its wide bandwidth. It can show up to 8 MHz of spectrum at once. I figured it should be able to watch TV. Turns out it can, but it's only designed to receive DVB-T.
Unfortunately, they only use that in Europe and a few other places. In North America we use ATSC.
In this article I will show how to use it to watch ATSC.
(Update 11/28/2015) See ATSC now possible on magnetic drives for updated info on sample rate and bit depth.
(Update 03/02/2016) You should use 7 MHz sampling instead of 8 MHz; it reduces bandwidth and space consumption and the narrower filter may help to block adjacent blowtorch stations. Also experiment with 8-bit recording, which cuts the file size and minimum write speed in half.
Background
ATSC is 6 MHz wide, so you have more than enough bandwidth on the SDRPlay. In theory you should be able to watch North American TV channels. Imagine my consternation when I searched online and found plenty of info on watching DVB-T, but practically nothing on ATSC!There was one way, using a program called GNURadio, but the ATSC system wasn't well documented. In fact, information on it was almost non-existent. I proceeded to search but without much success.
I'm a Windows user, so I tried installing GNURadio on Windows, but it was a huge mess, taking hours to compile and then it wouldn't even start. I gave up and decided to use Linux.
I downloaded the GNURadio Live DVD from their website. It is an ISO file containing a bootable Linux Ubuntu installation with GNURadio pre-installed. All you have to do is pop it in and reboot, and you've got a full-featured GNURadio installation.
But that still didn't explain how to make ATSC decoding happen. GNURadio uses blocks, which are little squares containing functions. You can drag them onto your workspace and draw wires between them to make stuff happen. I just needed to know which blocks to use. I found some instructions in the GNURadio repository, but they said to use certain blocks, such as ATSC Field Sync Demux, that I couldn't find.
I subscribed to the mailing list and asked about that. Ron Economos was very helpful and responded that the block I wanted had been renamed. He also offered to help me if I wanted to make the ATSC decoder work.
I continued to communicate with him and he said I should use the pre-made flowgraph file, "file_atsc_rx.grc". This contains the entire ATSC decoder in one block. It was a great idea, since I would've had to import and configure each individual block if I hadn't used this file.
I initially recorded a RAW IQ file in HDSDR (on Windows) and tried to decode it in GNURadio. It produced an unusable TS file. Then I tried a few more times. Sometimes I would get empty output files.
Finally, Ron told me that if there was any DC in the middle, it would break the decoder. I applied DC cancellation and got a working video file on September 7.
How to do it:
I'll assume you've got your SDRPlay's driver installed already. If not, you can find instructions on the SDRPlay website.- The easiest way to use GNURadio is to download the latest Live DVD from http://gnuradio.org/redmine/projects/gnuradio/wiki/GNURadioLiveDVD. It's over 1 GB, so start the download now so it can be done by the time you're ready for it.
- Install HDSDR. You can find it at http://www.hdsdr.de.
- Install the EXTIO plugin for the SDRPlay. It can be found at http://sdrplay.com/windows.htm. Make sure to install it in the HDSDR program folder.
- Connect an antenna to your SDRPlay. A rooftop Yagi is best, but "rabbit ears" will also work.
- Connect the USB connection to your computer. Turn on HDSDR.

- If everything is working, you will see a bright blue button labeled EXTIO. Click it. You will get a dialog similar to this:

- Under IF Bandwidth, choose 8 MHz. Make sure Sample Rate is set to 8.00
- Enable Tuner AGC is probably turned on for you, but if not, turn it on.
- Now click Advanced (at the bottom.) It should look like this:

- You *must* change Periodic to One Shot. Then change Tracking Period to 58.6 uS. Click Apply and Exit.

- Click Exit on the first dialog to return to HDSDR.
- There are some buttons on the bottom left. Click the one labeled Options [F7]. Then click Input Channel Calibration for RX.

- There's a button at the top-right labeled Off. Click it to change it to Auto.


- Click OK.
- Now you need to know the frequency of the TV station you want to record. To find a TV channel, go to http://www.antennapoint.com or http://antennaweb.org. I prefer antennapoint.com. Enter your zip code and it will give you a list of the TV channels in your area.
- In the table of channels, you will see a column labeled RF Channel. I'll pick channel 12.

- You need to find the desired station's RF channel and look it up at https://en.wikipedia.org/wiki/North_American_television_frequencies. In the table, find the channel and look under the Lower Edge column. That gives you the channel's lower edge frequency in megahertz. Add 3 to get the proper tuning frequency. The result will be used in the next step.

- Then, in HDSDR, tune the LO frequency to the result you got in the last step.

- In the buttons at the bottom of HDSDR, click Start [F2].

- You should now have a waterfall that looks like this:

- The stronger the signal, the greener, then redder, it'll get. Above is a great signal. If you have blue empty areas in the channel, repeat steps 16-18 to choose a stronger one. For example, this is what it should NOT look like:

- Now right-click the Record button (the red circle) and you will get this dialog:
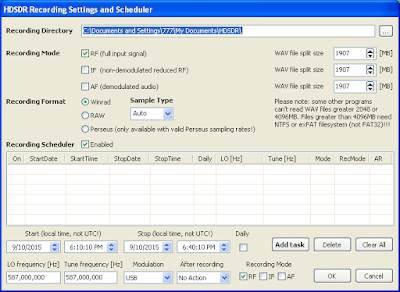
- Under Recording Mode, make sure RF (full input signal) is checked, and uncheck (if checked) IF and AF.
- Change Recording Format to RAW and Sample Type to PCM16.
- (Optional) Beside RF (full input signal), change WAV file split size to 4095 MB (or higher).
- Lastly, change Recording Directory to point to a fast disk, preferably a RAM drive. You will need about 32 MiB/sec sustained write (28 MiB/sec if using 7 MHz) to avoid dropping samples. I use SoftPerfect RAM Disk, which is free.
- Click OK to close the dialog.
- Take a recording by clicking the Record button. You may be limited by storage space to a minute or two if using a RAM drive.
- When you're done recording (or your RAM drive runs out of space) click the Stop button twice.

- If you used a RAM drive, now is the time to move the file off of it and onto your normal hard drive.

- (Recommended) If you used a RAM drive, you should unmount it to free up the memory
- Now, when your Live DVD image finishes downloading, burn it to a DVD. Alternatively, you can boot the ISO file in a virtual machine, but that goes beyond this tutorial.
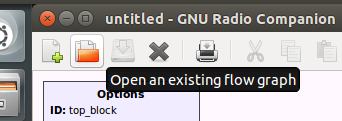
- Unlike Windows discs, this one doesn't ask you to "Press any key to start...", so it will boot up without intervention. It will take quite a while to start. When it does, there will be an icon labeled GRC on the desktop. Double-click it and wait for it to load.
- Click the Open button at the top.

- Click File System in the left sidebar.

- Navigate to usr/local/src/pybombs/src/gnuradio/gr-dtv/examples and open file_atsc_rx.grc

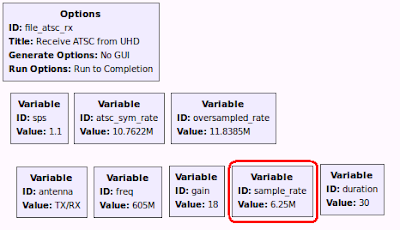
- There is a block labeled sample_rate. It will be set to "6.25M". Change it to 8000000. It should now say "8M"
- Double-click the block at the bottom labeled File Source. In the dialog that comes, click the "..." button beside the File field. Find and select your IQ file. Then click OK.


- Now double-click the File Sink block and save your output video file:

- Now click the Play button to execute the script:

- You'll get a terminal window. (The errors you see in the picture are nothing to worry about)

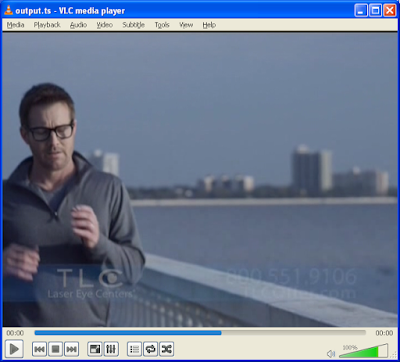
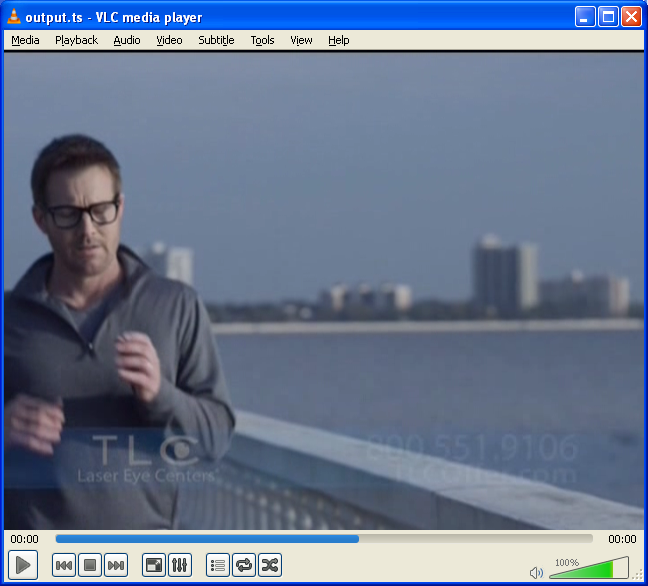
- Now boot back into Windows and open your TS file in VLC Media Player. VLC Media Player will let you choose which sub-channel to view, whereas most other players won't.


Troubleshooting:
If your TS file is empty (0 bytes) then (most likely) you didn't cancel the DC bar in the middle of your spectrum recording. Experiment with your settings until it goes away. If you're sure you don't have a DC spike, then check to see that the sample rate in GNUradio matches your file's sample rate (you might have set GNUradio to 8 MHz and fed it a 7 MHz file, or vice versa).If you get "!!! atsc_fs_checker: PN63 error count = xx" errors in your terminal window, then you experienced bad reception (or interference) during the recording. Take a new recording, adjust your antenna, or choose another station.
Fantastic work! I think you've started something that SDRPlay users will be fawning over for years! Can't wait to start experimenting.
ReplyDeleteThanks! I appreciate your compliments.
DeleteIf you want to try it yourself, I recommend you read my ATSC Update post. It describes the need for high-speed recording media; magnetic hard drives will *not* work.
Also, the ATSC decoder system is very finicky, so you need 100% perfect reception.
I have written a post that describes how to cut bandwidth down so it will work on a magnetic drive, if you're interested.
DeleteI'm curious if you could, in theory, filter out the streams that you don't want. For example, I'm only interested in the audio streams - cutting down the bandwidth to less than 1.5 megabits or so - making it very much writable to a hard drive. Obviously from this comment, you know that I know nothing about SDRs in general, but it is interesting what you're doing, though I don't understand too much about how all this works.
ReplyDeleteIt's all theoretical at this point, as my HDHomeRun from Silicon Dust can already filter out the wanted audio PIDs to a MPEG Transport Stream using the hdhomerun_config CLI, but it would be cool one day to be able to purchase an SDR and still do what I do without needing HDHomeRun tuners.
Timothy: You can't do it at the signal level. The bandwidth isn't proportioned into sections of utility; instead it's just one big transport stream at about 20Mbps. If you sample less signal, you effectively lose chunks of the data. You need the entire thing when sampling.
DeleteYou could however do in-memory processing, rip out only the stream you're interested and save that lesser data to disk. I was doing this eleven years ago (with custom hardware driven by a standard desktop PC) so it's definitely doable today! Your instincts about extracting PIDs and streams are exactly right.
The way we did it at the time was by writing the IQ data to an in-memory FIFO buffer instead of a file, operating on that in chunks and then writing out the smaller file.
Wayne is right, you can't sample a smaller RF bandwidth. However, if VOLK could run in CUDA we could decode TV in real time. This would eliminate the need for IQ recording, which takes too much space and HDD bandwidth, and only write the 19 Mbit (2.4 MiB/sec) final stream. This stream would contain all the subchannels yet not be anywhere near maxing out a magnetic HDD's bandwidth. After that, you could use FFmpeg to pick out and copy the stream(s) you're interested in.
DeleteAs I remember (long time ago) transport stream is really easy to process. Just a bunch of fixed-size packets (188 bytes each) which you can identify with a sync byte. Inside these packets is another, longer packet stream (PES) which contains the actual stream data, and an identifier declaring if it's video or audio.
ReplyDeletehttps://en.wikipedia.org/wiki/MPEG_transport_stream
https://en.wikipedia.org/wiki/Packetized_elementary_stream
Shouldn't be too difficult to unwrap!
(You could write the intermediate data to an in-memory file for processing and the relevant data to disk afterwards)
DeleteWill this work with HackRF? Can I get a copy of your mpeg.ts file?
ReplyDeleteI imagine it should, but HackRF is 8-bit, and I've had trouble using 8-bit recordings. The TS's are pretty big, but I may be able to upload one sometime.
DeleteYou could use GNUradio entirely with the gr-sdr source/sink blocks for GNUradio. Basically, gr-sdr is a wrapper for SoapySDR, which supports SDRPlay.
ReplyDeleteSoapySDRPlay is the SDRPlay module you need for SoapySDR.
DeleteSo, SoapySDR + SoapySDRPlay + gr-sdr + GNURadio is all you need.
Actually, gr-sdr is discontinued. See gr-osmosdr, esp. the master (most-recent) branch, which is GNUradio source/sink blocks that supports SDRPlay and SoapySDR.
ReplyDeleteDo you know if there is a way to display the raw RF waveform from the SDRplay either in real time or after the fact from a wav file? I am interested in creating an I/Q constellation plot for ATSC signals to "view" the signal quality. Depending on the style of plot it can look like a series of "eyes" stacked up.
ReplyDeleteYou could open the WAV file in Audacity. The I and Q would be the left and right channels, respectively. That would provide your time-domain waveform. As for a constellation, I have no idea how to get one from 8-VSB. There's a program called Signals Analyzer but the author is presumed dead. You can ask about it on IRC.
DeleteCould this be done with GNUradio for Windows and a Pluto? I could get my ubuntu server involved but if the Win10 box where the Pluto is can do it then id like to give it a try.
ReplyDeleteI believe it would work but ideally you want to find a way to record IQ to a file and decode it. Live decoding is basically impossible. The specs indicate that the ADALM-Pluto has 20 MHz bandwidth, a 12-bit ADC, and a tuning range that includes some TV frequencies, so it should work.
DeleteSource: https://wiki.analog.com/university/tools/pluto/devs/specs
Sounds good. I will let you know how I make out. The Pluto does DATV real well, I suppose 20Mbps is too much for some of the hardware or software in the RX chain. Thank you for your contribution, its a good instruction to GNUradio, ive been avoiding it for too long, but just got a Pluto.
Delete