Recently I've become interested in developing for Blackberry 10. After getting set up, I learned that Blackberry's security is so tight that you can't even run homemade apps on your own phone without a key from Blackberry's servers. I also heard that they would be closing their app store at the end of 2019, which concerned me because I didn't know if they would allow developers to keep writing apps after that.
I asked about it on Reddit and via direct email to Blackberry, with mixed responses. Fortunately, after I asked about it a Blackberry rep told the community that there are no plans to disable the app signing process, so we should be able to keep writing apps after the app store closes.
I decided to archive everything I could from Blackberry's official app development sources, including developer.blackberry.com and the entire BlackberryDev YouTube channel. The YouTube channel is not as interesting as the website, but I thought I might as well get everything in case things start getting taken down.
In this post I'm going to show you how you can download everything you need to develop for Blackberry 10 and install it from disk, in case Blackberry's site goes down. This obviously won't help if they can't sign your apps, but perhaps a solution for signing will be found by the time it's needed.
First, I downloaded developer.blackberry.com using HTTrack. The way I configured it, it was able to get the entire website, including the API documentation and many ZIP files. Unfortunately, I must have made a mistake with my job file because it missed a huge collection of EXE files, so I had to make a list and copy-paste it into a new HTTrack job so I could get them.
I decided to keep the two sets separate because the website and ZIP collection is 2.95 GiB, while the EXE set is 297 GiB, which is mostly phone firmware.
Anyway, to develop apps we need the Momentics IDE. The latest version right now is 2.1.2.
Direct links:
32-bit:
http://downloads.blackberry.com/upr/developers/downloads/momentics-2.1.2-201503050937.win32.x86.setup.exe
64-bit:
http://downloads.blackberry.com/upr/developers/downloads/momentics-2.1.2-201503050937.win32.x86_64.setup.exe
Once you pick a version, download and install it. I'm going to use the 32-bit version and install it with the default settings so it will end up in C:\bbndk. At the end, leave the option checked to start the IDE.
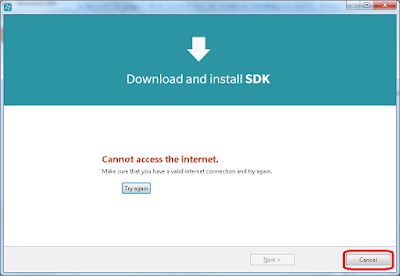
I unplugged my Internet cable so I could demonstrate how to do this offline. Click Cancel.
Click Yes because we will be installing an SDK from a pair of ZIP files. In the main IDE, go to Help->Update API Levels...
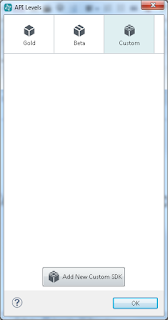
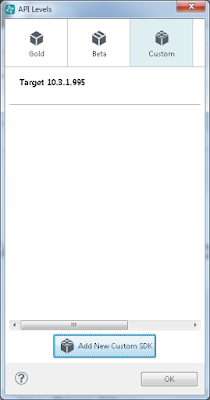
In the next dialog, go to the Custom tab. Note that this dialog will be much wider if you're connected to the Internet, because the other tabs will be populated.
I suggest API level 10.3.1.995. You'll need the following two files:
http://downloads.blackberry.com/upr/developers/update/bbndk/ndktargetrepo_10.3.1.995/packages/bbndk.win32.libraries.10.3.1.995.zip
http://downloads.blackberry.com/upr/developers/update/bbndk/ndktargetrepo_10.3.1.995/packages/bbndk.win32.tools.10.3.1.12.zip
Download and extract them. I used the C drive, so they ended up in C:\[zip file name]\.
(Update) I couldn't get the visual QML designer to work and it turns out I was missing some files.
http://downloads.blackberry.com/upr/developers/update/bbndk/ndktargetrepo_10.3.1.995/packages/bbndk.win32.cshost.10.3.1.995.zip (Necessary for the visual QML designer).
http://downloads.blackberry.com/upr/developers/update/bbndk/ndktargetrepo_10.3.1.995/packages/bbndk.win32.qmldocs.10.3.1.995.zip
http://downloads.blackberry.com/upr/developers/update/bbndk/ndktargetrepo_10.3.1.995/packages/bbndk.win32.documents.10.3.1.995.zip
These last three files will contain a folder called "target_10_3_1_995". Extract them to the same folder where you extracted win32.libraries.10.3.1.995.zip, so that the "target_10_3_1_995" folders from each zip file get merged with the one you already extracted.
In the dialog shown above, click Add New Custom SDK.
For "Target Path", click Browse and find the target folder from bbndk.win32.libraries.10.3.1.995.
Now for "Host Path", click Browse and find the host folder from bbndk.win32.tools.10.3.1.12.
In the Import SDK Platform dialog, change the Name field as desired.
Click Finish.
Now you have a fully functional API level so click OK.
(Update) If you want to be extra sure that you archive a working API level for offline installation, it looks like you can also use the automatic installer in the API Levels window to install an API, then close Momentics IDE and create a ZIP archive of your C:\bbndk folder.
In the IDE, go to File->New->Blackberry Project.
Just to finish the tutorial quickly, accept all the default options to create the project.
Click Yes.
Now you have a project ready to compile and run on a Blackberry 10 phone. Even though I have a BB10 phone, I don't want to have to get it set up and get a debug token yet, so let's use an emulator.
First we need VMware Player. My computer can't handle the latest version but older versions are still available from the official site. They're unlisted so you have to know the direct URL. I'm going to be using VMware Player 7.1.0.
https://download3.vmware.com/software/player/file/VMware-player-7.1.0-2496824.exe
Download this and install it.
Now you need the Blackberry emulation files. These files contain everything you need to emulate BB10 phones of various sizes, like square screens with a physical keyboard, or regular "tall" screens.
http://downloads.blackberry.com/upr/developers/update/bbndk/simulator/simulatorrepo_10.3.1.995/packages/bbndk.win32.simulator.10.3.1.995.zip
http://downloads.blackberry.com/upr/developers/update/bbndk/simulator/simulatorrepo_10.3.1.995/packages/bbndk.win32.simulatorController.10.3.1.995.zip
(Optional)
http://downloads.blackberry.com/upr/developers/update/bbndk/simulator/simulatorrepo_10.3.1.995/packages/bbndk.win32.bbmServerSimulator.10.3.1.995.zip
Download these and extract them to a folder called "10.3.1.995_emulator" or something similar.
If you click the green play button at the top-left of the IDE, you'll get this error message:
Click in the box the message is pointing to and select Add New Target...
In the Device Manager dialog, go to the Simulator tab.
Click Begin Simulator Setup.
You'll get this error if you're not online but that's okay because we already have all the files we need. Click OK on the error message, then click the link at the bottom left.
Browse for the VMX file within the bbndk.win32.simulator.10.3.1.995 subfolder.
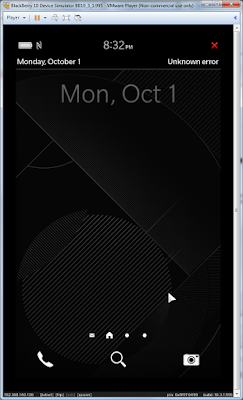
Click Open, then OK. The simulator will start automatically. By default, it will pick a "tall" resolution similar to a normal smartphone. If you want, you can choose a different resolution before it starts. To do that, click in the VM to capture the mouse and keyboard, press Enter, and follow the prompts. To un-capture the mouse and keyboard, press Ctrl+Alt.
For this first test, we're going to let it use the default resolution.
Back in the Momentics IDE Device Manager, it will ask for an IP address. It was entered automatically for me but if it's not automatic for you, you can find the right address at the bottom-left of the emulator.
Click Pair.
Now you have a working emulator that is recognized and listed by Momentics IDE's Device Manager. Notice that the "Open Controller" button is disabled. Since we installed from disk rather than the Internet, Momentics IDE doesn't know where to find the controller. To start it manually, navigate to the bbndk.win32.simulatorController.10.3.1.995 subfolder where you extracted the emulator ZIP's. Go into the subfolders to find "controller.exe". The full path is shown in the address bar in the next picture.
Double-click "controller.exe".
Again, mine was able to find the IP address automatically but if yours doesn't, you can enter it at the bottom.
Back in the Momentics IDE Device Manager, click Close. Notice that in the main IDE, you now have a valid simulator that you can run apps on.
Try clicking the green play button again.
Don't worry about these warnings. If you get an error dialog about a Java NullPointerException, just click OK and compile again.
When it's done, it should look like this.
Let's try it again but with a 720x720 square phone. To do that, we'll close and re-open the emulator. Once it starts, we'll click inside the VM, wait for the prompt, and press Enter, 2, and Enter again. Don't forget to press Ctrl+Alt to get out when you're done.
You may have to reconfigure the simulator in the IDE's Device Manager if it gives an error when you try to run the app. One time it said it didn't know the simulator's API level so I had to re-import the *.vmx file and pair it again.
If you're successful, the app should look like this.
I don't know why the color scheme is different for the BB10 keyboard phone.
On a side note, this simulator is surprisingly fast. I ran it on a computer from 2011 with a Core 2 Quad and 4GB RAM and it feels as fast as a real phone. In contrast, the Android emulator is barely usable on the same computer.
